
Welcome to the course!
- We should have reviewed the course and syllabus already - any questions?
- Here's a question for each of you - why should this course matter to you specifically?
- Outline for today:
- Course IDE
- Intro to Canvas 2D Drawing API
- "Hello Canvas ICE"
- Next Time:
- Begin to review your "230" JavaScript
- More Canvas
Course IDE
- Browsers:
- Google Chrome - assignments will be graded on Chrome
- IE 10
- Safari
- Firefox
- Text Editor of your choice:
- Notepad++ on Windows
- BBEdit or TextWrangler on Mac
- Gedit on Linux
- Documentation:
What is canvas?
- Canvas is a 2D drawing API that allows you to draw directly into a browser window without using Flash or Java.
- Canvas was originally created by Apple in 2004 for use with their Dashboard widgets and Safari Web Browser
- It was soon after picked up by Firefox, Opera, and Chrome. Currently supported by all modern browsers.
- The "Canvas 2D Context API" been standardized by WHATWG and the W3C
- Fairly concise API for drawing - take a look at the links above - the API headers would fit on 2 printed pages.
Where does the drawing go?
- Essentially, the browser gives you a rectangular area to draw into:
- The rectangular area is the bounds of a <canvas> tag
- Into this area you can draw rectangles, arcs, paths, curves, images, text, and even the contents of a <video> tag.
- Canvas is raster-based (shapes stored as rectangular grid of pixels) as opposed to being vector-based (shapes stored as math expressions) like Flash or SVG.
- Canvas can also be classified as an Immediate-mode graphics system where the developer had direct control over what is drawn on the screen, as opposed to a Retained-mode system (like Flash or Unity) where a list of objects that need drawing is retained by the system.
- What this means is that we as developers are responsible for building
Sprite-like classes and handling physics/collision detection/sound etc... - canvas won't do any of that for us.
How to get started
- You will need HTML, JavaScript, and usually a little CSS
- Steps:
- Put a <canvas> element on an HTML page
- Did the HTML page load?
- If so, get a reference to the <canvas> element
- Get a reference to the "2D drawing context" of the <canvas> element
- This drawing context is the object that contains the drawing API - so start drawing!
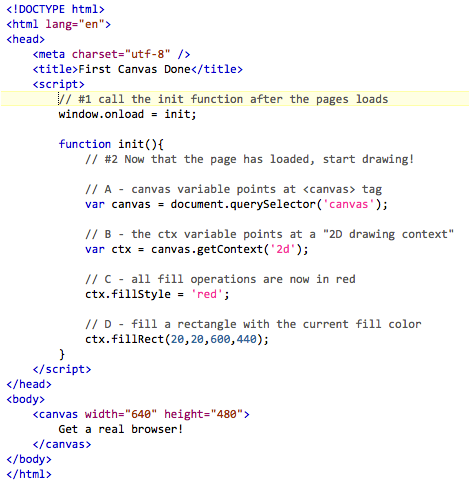
first-canvas.html


The code
<script>
        // #1 call the init function after the pages loads
		window.onload = init;

		function init(){
			// #2 Now that the page has loaded, start drawing!

			// A - canvas variable points at <canvas> tag
			var canvas = document.querySelector('canvas');

			// B - the ctx variable points at a "2D drawing context"
			var ctx = canvas.getContext('2d');

			// C - all fill operations are now in red
			ctx.fillStyle = 'red';

			// D - fill a rectangle with the current fill color
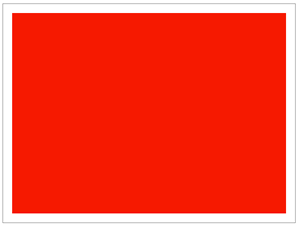
			ctx.fillRect(20,20,600,440);
		}
</script>
About the code
- The
ctxvariable is a reference to the "2D drawing context" - which gives us access to the entire canvas drawing API. ctx.fillStyleis one property of the drawing context. This property sets the color of all future "fill" operations.ctx.fillRect()is one of the methods of the drawing context. This method "fills" a specified rectangle with current fill color.
Note: We have to wait until the HTML page has loaded before we run the init(), or the code will fail.
Go download the source (first-canvas.html) from mycourses.rit.edu so that we can make some changes to the drawing code and also "break" (and fix) the page. We'll also take a quick look at debugging your JavaScript.
In-class exercise (ICE)
- The "Hello Canvas" ICE will get you doing a little bit more with canvas such as drawing text.
- Let's look over the ICE - you'll need to work on it before our next class meeting because we will be building on it next time.
Be sure to carefully read and absorb the material in the ICE - don't just quickly blast through it. Most of the course material will be contained in the ICE's and Study Guides, rather than in the slides like you might expect.
